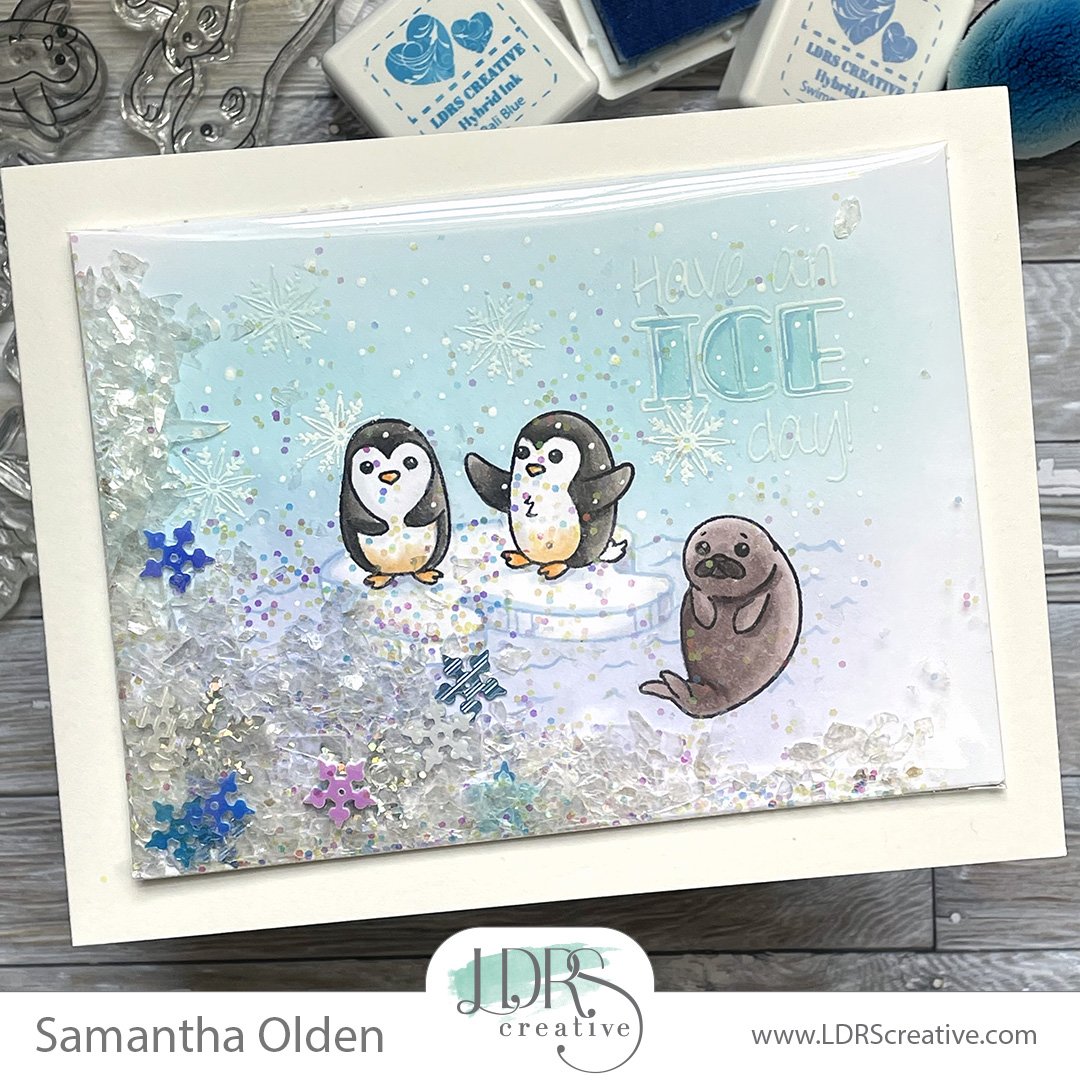
LDRS: Have an Ice Day
/Todays card features the stamp set Have an Ice Day. The card is also one of those edge to edge shaker cards, which are very popular right now. In past I’ve avoided edge to edge shaker card because I was afraid of making a great big mess. One time I attempted something similar with a fuse tool and I ended up with glitter absolutely everywhere. But I’m telling ya they are surprisingly very, very easy to make. So I am thinking there are a lot of Holiday edge to edge shaker cards in my future : )

Get the Look:
Overall this is a simple scene to layout with a little bit of masking. If you have a stamp postioner use that because it can help take guess work out of which stamp to stamp first. From Have an Ice Day stamp set; first position the iceberg roughly in the centre of 4 3/4” x 3 1/2” white card stock and then lay penguins and walrus out overtop of the iceberg stamp. When you close the stamp positioner lid the penguins and walrus will stick to the lid, while the iceberg won’t. Remove the iceberg and using alcohol friendly ink, stamp the critters on card stock. Then stamp critters on masking paper, cut out and place over images.
Position the iceberg over the stamped and masked penguins. Now something I absolutely love about LDRS hybrid inks are they are alcohol ink friendly. So I chose not to stamp my iceberg in black but with swimming hole hybrid ink. It is this beautiful soft icy blue that is perfect for ice colour. Now stamp the iceberg. I also stamped a mask and masked the iceberg.
If your not a fan of masking you can totally skip these steps and get a very similar look by colouring the critters, die cutting and then simply arranging them over an ink blended background.
Stamp and heat emboss the sentiment. I used white but in hindsight maybe that was a little too subtle; perhaps silver would work better.
Now I did a little bit of stamp surgery so I could stamp and emboss the snowflakes separately, but you can always mask the sentiment part out.
Using blending brushes, lightly blend bali blue and swimming hole over stamped and masked card panel.
Remove masks, colour your critters and possibly add a little bit of colour to emphasize the word ‘ice’.
So now that panel is complete, it’s a matter of creating the edge to edge shaker element.
Find some plastic packaging that is about 1/4-1/2” wider on each side of the card panel. Add adhesive tape on all 4 sides of the backside of the card panel, but you could add it to the plastic packaging instead. Remove adhesive backer and attach 3 sides of the plastic to the card panel.
While attaching the sides, trim the excess plastic at the corners to remove some bulk. Just be careful to not trim so much off that you end up with a hole in the corner. Leave one side open to add all the glittery goodness.
Add your glitter and sequins, I would just stick to things that have a fairly flat profile. Remove final adhesive backer and seal up your last side. I was impressed with how well all the glittery bits moved around even thou its a fairly flat shaker.
Finally add panel to a 4 1/4” x 5 1/2” card base.

Hope you enjoyed the card and learned a few things along the way. Happy papercrafting : )
