Beyond the Card: Felt Ornament
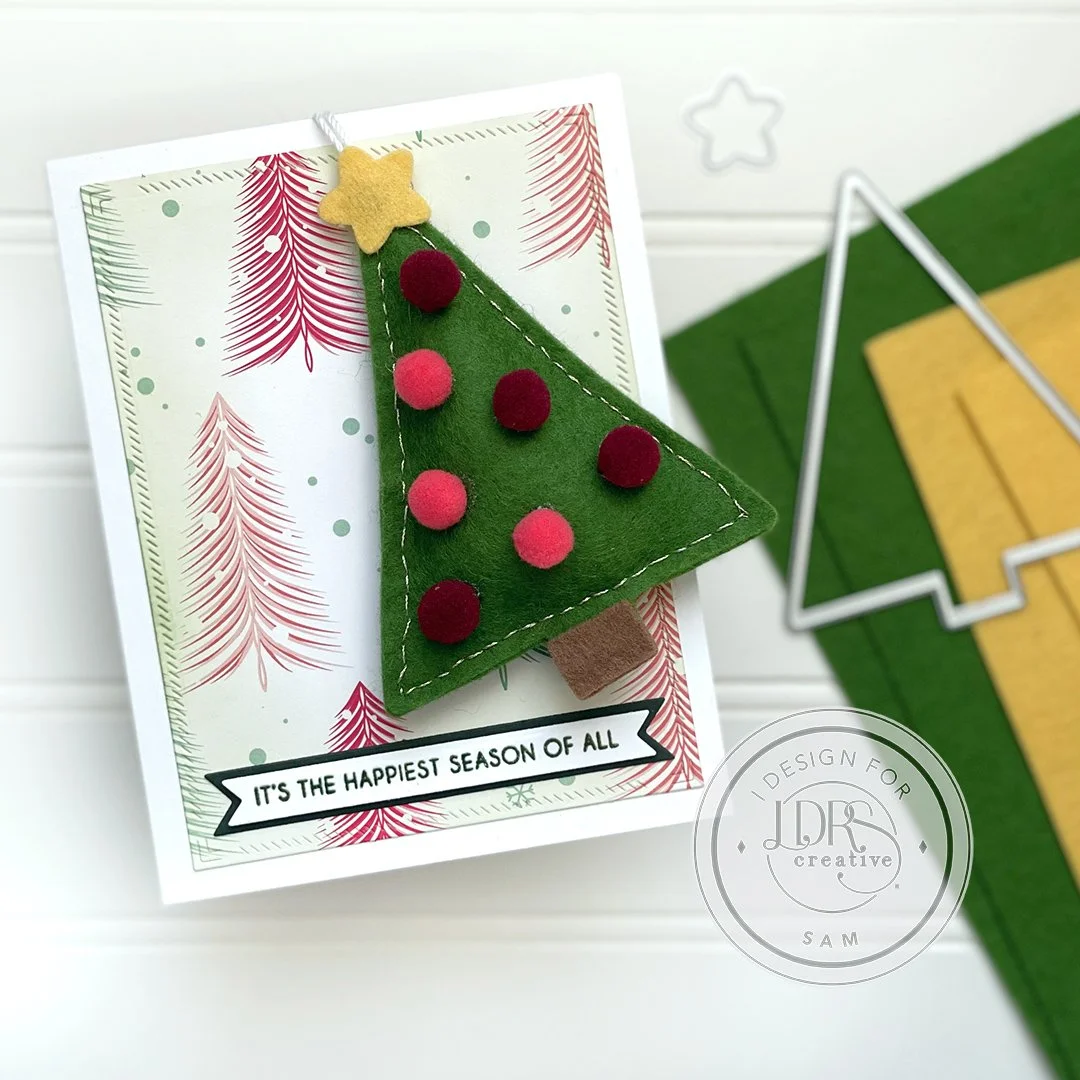
/Hello there, Sam back with yet another card using the Holiday Floral Co-ordinating Dies. I have really enjoyed playing with the Holiday Floral Stamp and Dies they are so versatile. So many amazing ways to combined both stamps and dies or to use them separately.
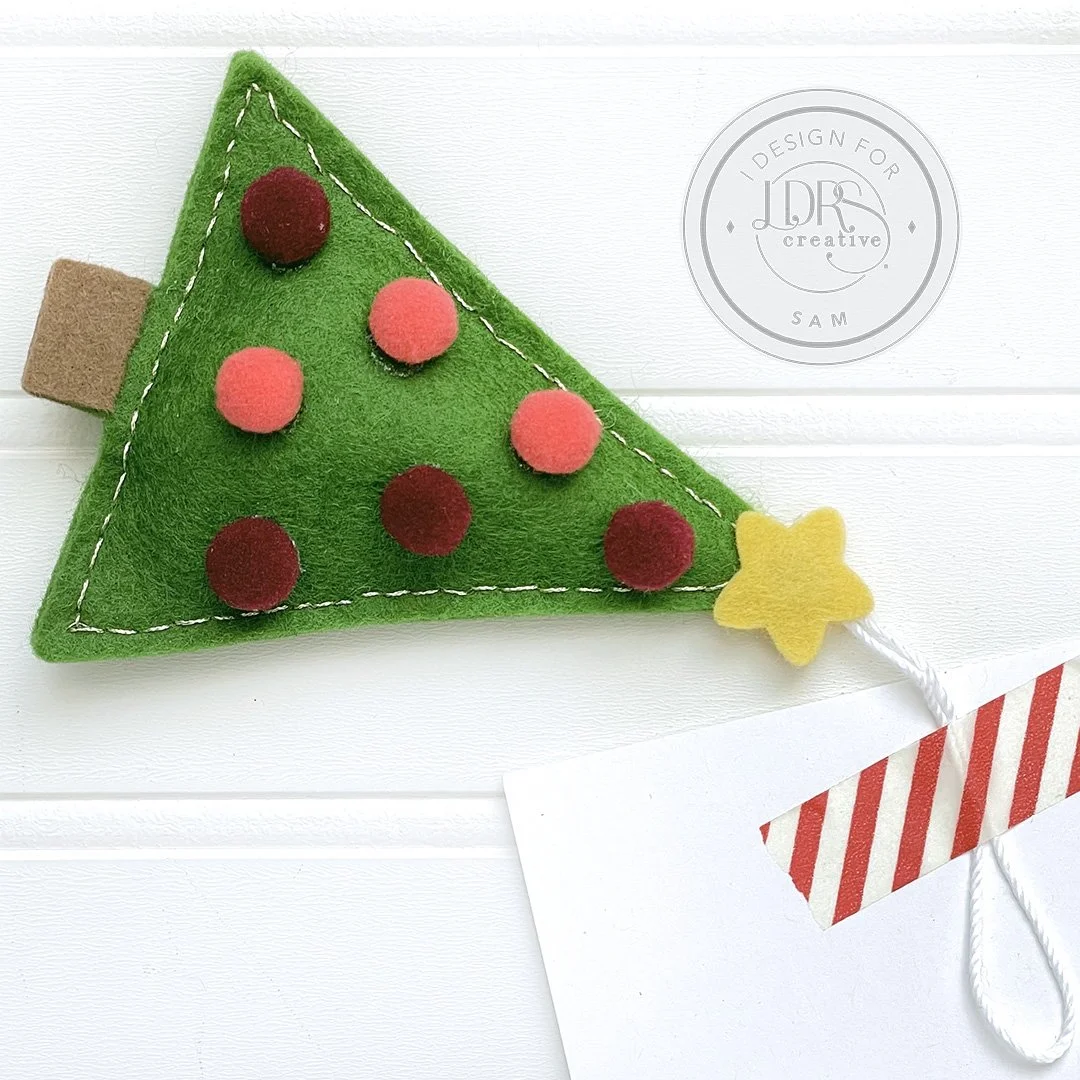
Recently I have been experimenting a little with sewing felt. This is very much stepping out out of my comfort zone, but I have enjoyed the process and learning a new skill. As you will see I haven’t quite perfected sewing a straight line yet. So lets go beyond the card and sew a felt ornament. A bonus surprise for the recipient not only will they receive a card, but an ornament they can hang.

Felt Ornament:

In order to create the felt ornament you need…..
2 die cuts of the large tree from Holiday Floral Dies in green felt.
2 die cut stars from Never Stop Dreaming Co-ordinating Dies in yellow or gold felt.
Embroidery floss or thread, quilt batting cut into a triangle slightly smaller than green felt tree, loop of white embroidery floss and colourful mini pom poms.
Option to cut 2 smaller rectangular brown felt pieces that will overlay over the green trunk.
To keep the sewing relatively simple follow the triangular area of the tree and use a running stitch
First line up die cut trees. Starting about mid way across the base of the layered trees use a running stitch and sew up to the peak.
Lay one end of the white embroidery floss loop in-between the 2 layers of the felt tree at the peak and continue sewing to attach the ornament hanger.
At this point tuck in the quilt batting and continue sewing until you meet up with where you started along the felt tree base. If you wish to make the sewing a single seam without gaps, simply reverse the sewing and head all the way back to the beginning filling in the gaps.
Now the fun part. Use a glue gun to attach the pom pom ornaments and the stars to the felt tree. One star for each side of tree. If you wish glue gun trunk together and cover with brown felt rectangles on both sides for a finished look.
Pulling Card Together:
Last thing to do is create the card background to hang the ornament on.
Ink blend lightly some olive branch ink over edge of an A2 Diagonal Stitched die cut piece of MacKenna Christmas 12x12 Paper Pack.
Stamp and heat emboss in green the Christmas Sentiment Stack. Choose a sentiment and back with Sentiment Stack Dies and Sentiment Stack Shadow Dies
Lastly hang the felt ornament over the card and simply attach the string to the back of the card with some washi tape.

Hope you give this a try and I’ve given you a fun different way to use the Holiday Floral Stamp and Dies. Happy papercrafting : )
