Simple Ways to Use Pattern Paper
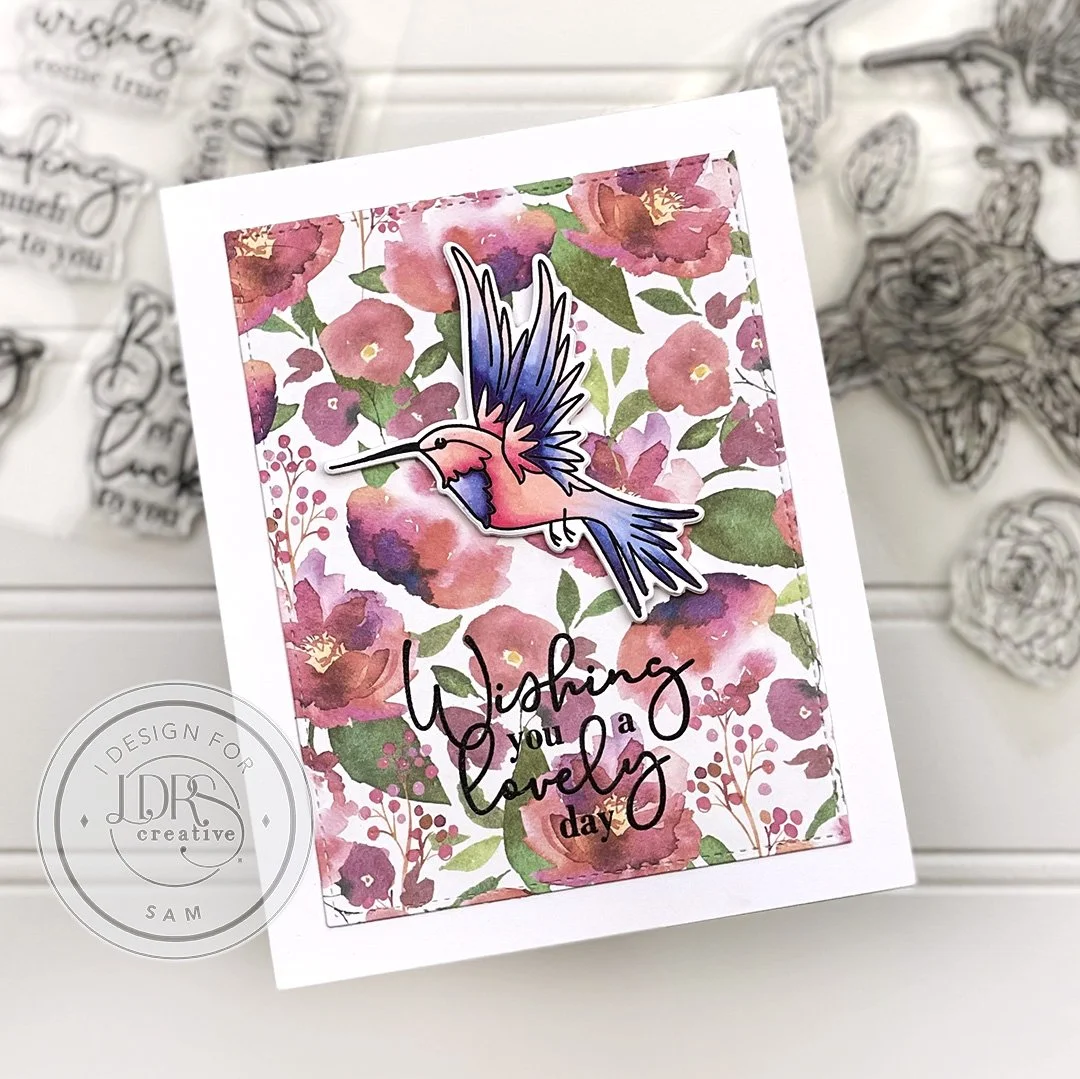
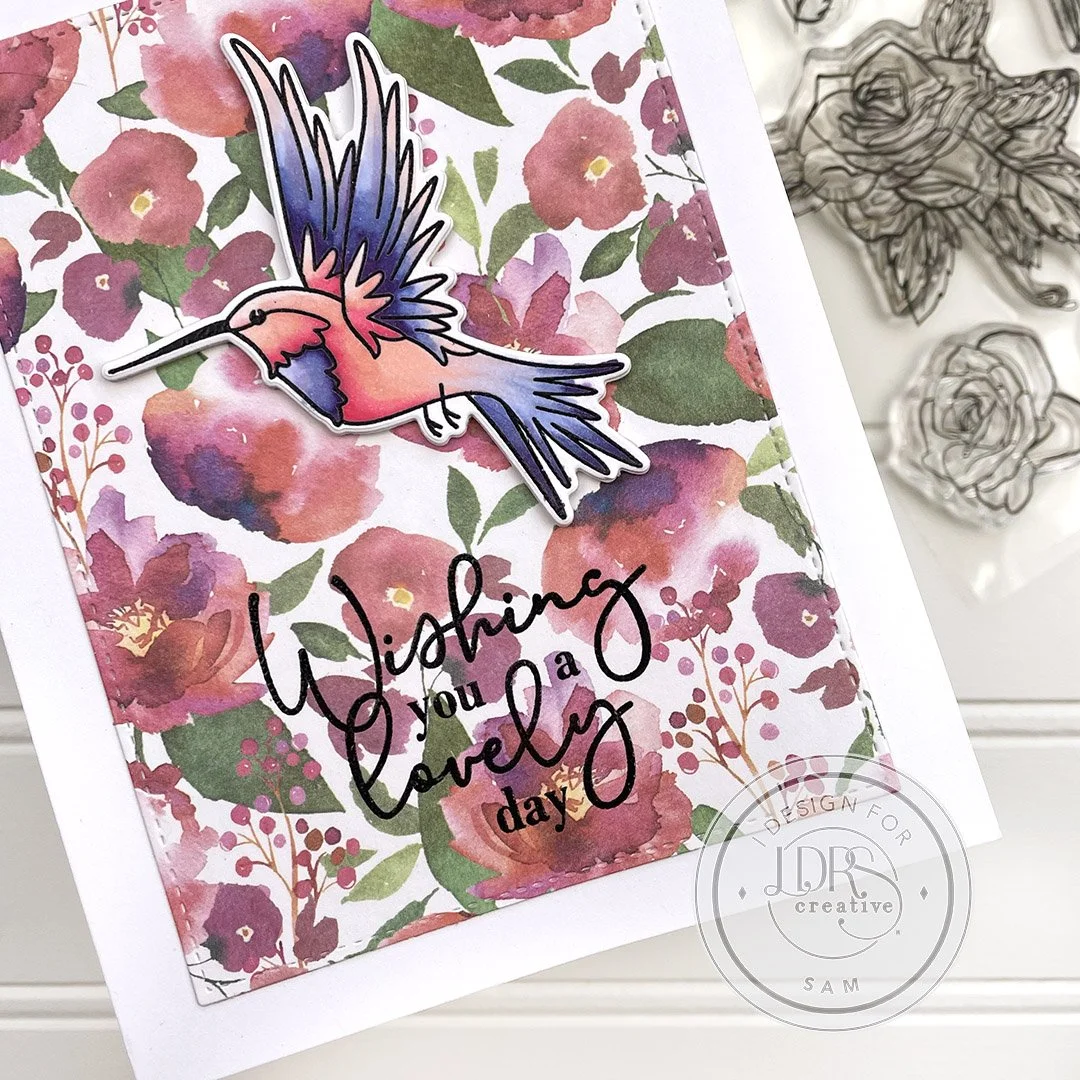
/Some crafters seem to just know how to pull together pattern paper perfectly. I struggle with using bold pattern paper. I’ll gather a few together with matching colour tones and see if I can’t lay them out, but it always seems so busy and not pleasing to the eye. I’ve managed to find a way to make pattern paper work for me; I follow the keep it simple rule. This card is simple with 3 elements, bold pattern paper, stamped image and sentiment.
The hummingbird and sentiment is from the latest LDRS Creative With Affection Release. The pattern paper is called Lovely Water-colour from an older paper pack.
Get the look:
Pull a floral sheet from the lovely watercolour pattern paper pad. Cut to 3 1/2” x 4 3/4”
Adhere the pattern paper to an A2 card base.
Stamp a hummingbird from the Trailing Hummingbird stamp set onto alcohol friendly card stock.
Colour the hummingbird. Pull alcohol marker colour blends that match the colour tones of the pattern paper.
Die cut the hummingbird. Now giving depth and separation is key to having the hummingbird stand off the pattern paper. So either add adhesive tape behind the hummingbird or cut 2 additional sets of hummingbirds from white cardstock and layer behind the stamped image.
Choose a sentiment from the My Wish For You Sentiments Stamp Set. Stamp and emboss in black. The embossing helps it stand out from the pattern background.
Lastly add the hummingbird to your card.

If you struggle with pattern paper like me, hope this gives you an idea how to use them. Happy papercrafting : )
